Overview
Deploying an AI chat application on a cloud server involves far more than loading a model onto a GPU and calling an API. A production chat app requires a responsive frontend, a secure API backend, real-time streaming infrastructure, authentication, rate limiting, and monitoring—all running reliably alongside the inference engine. This article walks through the complete deployment workflow: why chat apps demand a multi-tier architecture, how to select the right server configuration for your model and user base, which software stacks work best for each layer, and the production hardening checklist that separates a working prototype from a reliable service.
Why Does Chat App Deployment Differ from Running a Standalone Model?
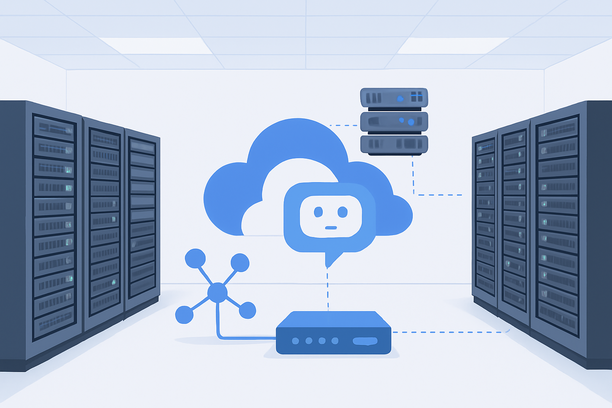
A chat application adds several infrastructure layers on top of the AI model itself. The model handles natural language generation, but the application must manage user sessions, stream responses token by token, enforce usage limits, handle errors gracefully, and serve a web interface that feels instant to the end user.
Think of it as three distinct tiers:
| Tier | Components | Typical Technology |
|---|---|---|
| Presentation | Chat UI, streaming renderer, WebSocket client | React, Next.js, Vue, vanilla JS |
| Application | API server, authentication, rate limiting, session store | FastAPI, Express.js, Go |
| AI / Model | Inference engine, model files, GPU runtime | vLLM, Ollama, TGI, Triton |
Running a model endpoint alone gives you the third tier. A deployable chat application needs all three working together, and the deployment decisions in each tier affect latency, cost, and reliability differently.
What Server Configuration Works for an AI Chat App?
Select a cloud server based on your model size, expected concurrent users, and the overhead of your application stack. GPU memory is the binding constraint—the model must fit in VRAM—while CPU and system RAM handle the API layer, web server, and any pre- or post-processing logic.
Here is a practical configuration matrix for common chat app scenarios:
| Scenario | Model Size | Minimum GPU | System RAM | Storage | CPU Cores |
|---|---|---|---|---|---|
| Personal or development chatbot | 7B–8B params | 1× RTX 4090 (24 GB) | 32 GB | 200 GB NVMe | 8 |
| Small team (5–20 users) | 13B–14B params | 1× A100 (40/80 GB) | 64 GB | 500 GB NVMe | 16 |
| Production SaaS (50+ users) | 70B+ params | 2–4× A100 80 GB | 128 GB+ | 1 TB NVMe RAID | 32+ |
| Light chatbot (API proxy only) | N/A—calls external API | CPU-only | 8–16 GB | 50 GB SSD | 4 |
For production workloads, bare-metal cloud servers often deliver better price-performance than general-purpose virtual machines. You get dedicated GPU access without noisy-neighbor contention, and as your user base grows, upgrading to a higher configuration through the provider's management console is straightforward. RAKsmart's bare-metal cloud options, for example, support upgrade and downgrade workflows that let you adjust CPU, memory, and GPU allocation as demand shifts—useful when your chat app transitions from prototype to a live product with predictable traffic patterns.
Which Backend Framework Should You Choose?
The backend routes user messages to the model, manages streaming responses, handles authentication, and enforces rate limits. Your choice depends on your team's language preference and how tightly the inference engine needs to integrate with the application logic.
FastAPI (Python) is the most common choice for AI chat backends. It integrates directly with Python-based inference libraries like Hugging Face Transformers, vLLM, and Ollama. Native async support and built-in WebSocket handling make it well-suited for streaming token-by-token responses to the frontend.
Express.js or Fastify (Node.js) works well if your team prefers JavaScript or TypeScript. You would call the model inference as an external HTTP service and handle streaming via Server-Sent Events (SSE) or WebSocket connections.
Go or Rust backends offer the lowest latency and highest throughput for the application layer, but require calling the inference engine as a separate service rather than embedding it directly.
Inference framework comparison
| Framework | Best For | Streaming | Docker Support | Setup Complexity |
|---|---|---|---|---|
| vLLM | High-throughput production serving | Yes (SSE) | Yes | Moderate |
| Ollama | Local dev, small models, simplicity | Yes | Yes | Easy |
| Text Generation Inference | Hugging Face ecosystem | Yes | Yes | Moderate |
| Triton Inference Server | Multi-model enterprise deployments | Yes | Yes | Complex |
For a new production deployment, vLLM is a strong default. It supports PagedAttention for efficient memory usage, handles concurrent requests well, and exposes an OpenAI-compatible API endpoint that simplifies frontend integration.
How Do You Deploy the Complete Stack?
This section walks through a practical deployment workflow on a Linux-based cloud server with GPU access. The approach uses Docker for isolation and reproducibility across all tiers.
Step 1: Prepare the server environment. Connect via SSH and install the NVIDIA driver, CUDA toolkit, and Docker with NVIDIA Container Toolkit. Verify GPU access by running nvidia-smi after driver installation. Confirm Docker GPU passthrough with a test container before proceeding.
Step 2: Deploy the inference engine. Start your model server using Docker. A typical vLLM command with a Llama-based model would expose an OpenAI-compatible API on a local port. Test the endpoint with a curl request to confirm the model is responding before building the application layer on top of it.
Step 3: Build and deploy the API backend. Create a FastAPI application that proxies requests to the inference engine. Key components include a chat endpoint that accepts user messages and returns streaming responses, session management backed by Redis for production, rate limiting to prevent abuse, and API key or JWT authentication.
Step 4: Deploy the chat interface. Serve the frontend as a static build behind a reverse proxy like Nginx or Caddy. The reverse proxy handles TLS termination, routes /api/* requests to the backend, and serves the chat UI for all other paths.
Step 5: Configure networking and security. Open only the ports you need—typically 443 for HTTPS and 22 for SSH from a restricted IP range. Set up a firewall rule to deny all other inbound traffic. Enable TLS with Let's Encrypt or a commercial certificate.
What Production Hardening Steps Matter Most?
A chat application in production faces real traffic, adversarial users, and the need for consistent uptime. These steps separate a working prototype from a reliable service:
- Health checks and auto-restart. Configure Docker health checks or a process manager that restarts the inference engine if it crashes. GPU memory leaks and out-of-memory errors are common with long-running inference processes.
- Streaming timeout handling. Set reasonable timeouts for both the backend-to-model connection and the backend-to-client streaming connection. A stalled model response should not hold a user's session indefinitely.
- Graceful degradation. If the model is overloaded or unreachable, return a meaningful error rather than a raw 502 or 504. Queue requests or display a retry message instead of dropping the connection.
- Monitoring and logging. Deploy Prometheus and Grafana—or a lighter alternative—to track request latency, GPU utilization, error rates, and concurrent session counts. Log inference times per request to identify slow queries before users notice them.
- Backups. Regularly back up your application configuration, fine-tuned model weights, and any user data. Cloud-native backup tools capture disk state at a point in time, so pause write operations or stop the server before creating a backup to ensure data integrity.
Deployment Readiness Checklist
Use this checklist to verify your AI chat app is ready for real users:
- Inference engine is running and responding to API calls
- Backend API is deployed with authentication and rate limiting enabled
- Chat interface is served over HTTPS with a valid certificate
- WebSocket or SSE streaming works end-to-end across all three tiers
- Health checks are configured and auto-restart is enabled
- Firewall is locked down to required ports only
- Monitoring dashboards are live showing latency, GPU usage, and error rates
- Backups are scheduled and have been tested for restoration
- Error handling covers model timeouts, GPU OOM, and network failures
- Load testing confirms the server handles expected concurrent user volume
How Do You Scale When Demand Grows?
Scaling an AI chat app follows two axes: vertical and horizontal. Vertical scaling means upgrading to a server with more GPU VRAM, CPU cores, and RAM. This is the simplest path when demand is still within the range of a single powerful machine.
For cloud bare-metal providers, vertical scaling typically involves selecting a higher configuration and restarting the instance with the new hardware. RAKsmart's bare-metal cloud upgrade workflow, accessible through the server management interface, handles CPU, memory, and network reassignment automatically during the process.
Horizontal scaling adds more servers behind a load balancer. This works well for the API and frontend tiers, which are stateless and easy to replicate. For the inference tier, horizontal scaling means running multiple model instances and routing requests across them using tools like Nginx upstream configuration or a dedicated load balancer.
| Component | Scaling Strategy | Notes |
|---|---|---|
| Frontend (static) | CDN or multiple Nginx instances | Stateless, trivially scalable |
| API backend | Load balancer + multiple instances | Session state in Redis, not in-memory |
| Inference engine | Multiple GPU servers or multi-GPU node | Requires model sharding for 70B+ models |
FAQ
Can I deploy an AI chat app on a CPU-only cloud server?
Yes, but only if you call an external API like OpenAI's rather than running a local model. Running a local LLM on CPU is possible for very small models (1B–3B parameters), but inference will be slow—often 10–30 seconds per response—making the chat experience poor for real-time interaction. For self-hosted model serving, a GPU is strongly recommended.
What is the minimum server configuration for a usable AI chat app?
For a personal or development chat app running a 7B–8B parameter model, a server with a single 24 GB GPU (such as an RTX 4090), 32 GB system RAM, 8 CPU cores, and 200 GB NVMe storage is sufficient. This handles the model, the API backend, and the web server on a single machine.
How do I handle streaming responses in the chat interface?
Use Server-Sent Events (SSE) or WebSocket connections between the frontend and your API backend. The backend streams tokens as they are generated by the inference engine. In a FastAPI application, use StreamingResponse with an async generator. On the frontend, use the EventSource API for SSE or a WebSocket library to receive and render tokens in real time.
Should I use Docker for deploying my AI chat app stack?
Docker is recommended for production deployments because it isolates the inference engine, backend, and supporting services into reproducible containers. This eliminates dependency conflicts, simplifies updates, and makes it straightforward to migrate your deployment between servers. Docker Compose manages multi-container setups with a single configuration file.
How much does it cost to run an AI chat application on a cloud server?
Costs vary by model size and server configuration. A single-GPU bare-metal server capable of running a 7B parameter chat model typically starts around $150–300 per month depending on the provider and region. Larger models like 70B+ parameter variants require multi-GPU setups that can cost $500–2000 or more per month. If you use an external API instead of self-hosting, costs shift to per-token pricing with no fixed infrastructure expense.
Conclusion
Deploying an AI chat application on a cloud server is a multi-layer project that extends well beyond model inference. The chat interface, API backend, authentication, streaming pipeline, and observability tools all need to be deployed and hardened before the application is ready for real users. Start with a single-server setup using Docker Compose, validate the full request flow end-to-end, and then apply the production hardening checklist before opening the application to traffic. When you are ready to move from a local development setup to a production cloud server, exploring GPU-equipped bare-metal options with flexible upgrade paths can help you match infrastructure to your actual usage as the application grows.